Drawing is a fundamental skill that allows us to visually express our thoughts, ideas, and creativity. Whether you’re an aspiring artist or just looking for a fun hobby, drawing can be a rewarding and enjoyable activity. One delightful subject to draw is the corgi, a small, charming dog breed known for its adorable features and playful personality. In this article, Complete Information About Drawing:u4mk-y-vriu= Corgi we will delve into the art of drawing corgis, covering everything from basic techniques to adding intricate details.
Understanding the Basics of Drawing
Tools and Materials Needed
Before you start drawing, it’s essential to gather the right tools and materials. You’ll need:
- Pencils (various grades)
- Erasers (kneaded and regular)
- Drawing paper or sketchbook
- Sharpener
- Ruler
Basic Drawing Techniques
Mastering basic drawing techniques is crucial for creating a solid foundation. Focus on:
- Line Drawing: Start with simple lines and shapes.
- Hatching and Cross-Hatching: Techniques for shading and adding texture.
- Blending: Smooth out pencil strokes for a polished look.
Importance of Practice
Complete Information About Drawing:u4mk-y-vriu= Corgi Like any skill, drawing requires regular practice. Set aside time each day to draw, and don’t be discouraged by initial challenges. Consistency is key to improvement.
Why Choose Corgis as a Drawing Subject?
Corgis’ Unique Physical Features
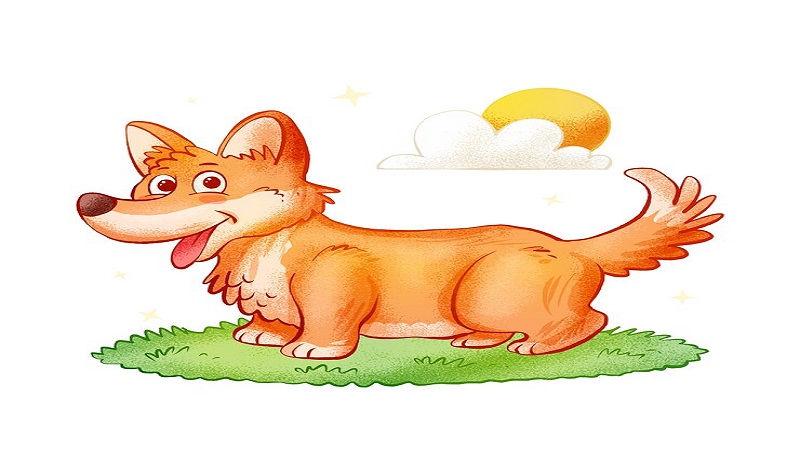
Corgis are characterized by their short legs, long bodies, and expressive faces. These distinctive features make them a fun and interesting subject to draw.
Popularity and Appeal of Corgis
Corgis are beloved by many for their friendly demeanor and cute appearance. Drawing a corgi can bring joy to both the artist and those who view the artwork.
Preparing to Draw a Corgi
Gathering References
Collect high-quality images of corgis to use as references. Look for pictures that show different angles and poses.
Understanding Corgi Anatomy
Study the anatomy of corgis to understand their proportions and structure. This knowledge will help you create a more accurate drawing.
Setting Up Your Workspace
Ensure your workspace is well-lit and free from distractions. Arrange your materials within easy reach.
Sketching the Corgi
Starting with Basic Shapes
Complete Information About Drawing:u4mk-y-vriu= Corgi Begin your sketch by drawing basic shapes to outline the corgi’s body. Use circles, ovals, and rectangles to map out the proportions.
Proportions and Structure
Pay attention to the proportions of the corgi’s body. Their legs are short, and their bodies are long. Make sure these elements are accurately represented in your sketch.
Refining the Sketch
Once the basic shapes are in place, start refining your sketch. Add more detail and definition to the corgi’s form.
Drawing the Head
Capturing the Corgi’s Face
The face is one of the most important parts of your drawing. Focus on getting the shape of the head right.
Drawing the Eyes, Nose, and Mouth
Add the eyes, nose, and mouth, paying close attention to their placement and size. These features give the corgi its expression.
Adding Details to the Ears
Corgis have distinctive ears. Make sure to capture their shape and position accurately.
Drawing the Body
Understanding the Corgi’s Body Shape
Complete Information About Drawing:u4mk-y-vriu= Corgi The body of a corgi is long and low to the ground. Draw the torso, making sure it connects naturally with the head and legs.
Drawing the Legs and Paws
Corgis have short legs and small paws. Draw these features carefully, ensuring they are proportionate to the body.
Adding Details to the Fur
Add details to the fur to give your drawing texture and realism. Use short, quick strokes to mimic the appearance of fur.
Drawing the Tail and Final Details
Positioning the Tail
Draw the tail in a position that complements the corgi’s pose. Corgis often have short, fluffy tails.
Final Touches and Textures
Add final touches to your drawing, enhancing textures and refining details.
Adding Personality to Your Drawing
Give your corgi drawing personality by emphasizing its unique features and expression.
Shading and Texturing
Basics of Shading
Complete Information About Drawing:u4mk-y-vriu= Corgi Shading adds depth and dimension to your drawing. Use light and shadow to create a three-dimensional effect.
Techniques for Fur Texture
Create fur texture by using short, quick strokes. Vary the pressure on your pencil to achieve different shades and textures.
Creating Depth and Dimension
Use shading to highlight the contours of the corgi’s body, giving your drawing a lifelike appearance.
Coloring Your Corgi Drawing
Choosing the Right Colors
Select colors that match the corgi’s fur. Common colors include tan, white, and black.
Techniques for Coloring with Pencils
Use colored pencils to add color to your drawing. Layer different shades to create a realistic effect.
Blending and Layering Colors
Blend colors smoothly by layering them gradually. Use a blending tool if necessary to achieve a polished look.
Finalizing Your Artwork
Reviewing and Making Adjustments
Take a step back and review your drawing. Make any necessary adjustments to improve the overall look.
Signing Your Work
Sign your drawing to mark it as your own. This adds a professional touch to your artwork.
Preserving Your Drawing
Protect your drawing by storing it in a safe place or framing it. This will preserve your artwork for years to come.
Tips for Improving Your Drawing Skills
Regular Practice
Practice regularly to keep improving your skills. The more you draw, the better you’ll become.
Seeking Feedback
Ask for feedback from other artists or friends. Constructive criticism can help you identify areas for improvement.
Studying Other Artists
Study the work of other artists to learn new techniques and styles. This can inspire you and enhance your own drawing skills.
Common Mistakes to Avoid
Overworking the Drawing
Avoid overworking your drawing by knowing when to stop. Too many details can make the drawing look cluttered.
Ignoring Proportions
Pay attention to proportions to ensure your drawing looks accurate. Mistakes in proportions can make the drawing look unrealistic.
Using the Wrong Materials
Use high-quality materials to achieve the best results. Poor-quality materials can hinder your progress and affect the final outcome.
Showcasing Your Art
Sharing on Social Media
Complete Information About Drawing:u4mk-y-vriu= Corgi Share your artwork on social media platforms to reach a wider audience. This can help you gain recognition and feedback.
Participating in Art Communities
Join art communities to connect with other artists. This can provide support and inspiration.
Creating a Portfolio
Create a portfolio to showcase your best work. This is useful for gaining opportunities and sharing your progress.
Conclusion
Complete Information About Drawing:u4mk-y-vriu= Corgi is a fun and rewarding experience. By following the steps outlined in this article, you can create beautiful and lifelike drawings of these charming dogs. Remember to practice regularly, seek feedback, and enjoy the process. Happy drawing!Read More Infotimedod.
FAQs
How long does it take to learn to draw well?
The time it takes to learn to draw well varies for each person. With regular practice and dedication, you can see significant improvement in a few months.
What are the best materials for beginners?
Beginners should start with basic materials like pencils, erasers, and good-quality drawing paper. As you progress, you can experiment with more advanced tools.
Can I learn to draw Corgis if I’m not good at drawing?
Absolutely! Anyone can learn to draw with practice and patience. Start with basic shapes and gradually add details as you improve.
Where can I find good references for drawing?
You can find good references online, in books, or by observing real-life corgis. Look for high-quality images that show different angles and poses.
How do I keep improving my drawing skills?
Keep improving your drawing skills by practicing regularly, seeking feedback, studying other artists, and experimenting with new techniques.